授权
权限系统的作用
例如一个学校图书馆的管理系统,如果是普通学生登录就能看到借书还书相关的功能,不可能让他看到并且去使用添加书籍信息,删除书籍信息等功能。但是如果是一个图书馆管理员的账号登录了,应该就能看到并使用添加书籍信息,删除书籍信息等功能。
总结起来就是不同的用户可以使用不同的功能。这就是权限系统要去实现的效果。
我们不能只依赖前端去判断用户的权限来选择显示哪些菜单哪些按钮。因为如果只是这样,如果有人知道了对应功能的接口地址就可以不通过前端,直接去发送请求来实现相关功能操作。
所以我们还需要在后台进行用户权限的判断,判断当前用户是否有相应的权限,必须基于所需权限才能进行相应的操作。
授权基本流程
在SpringSecurity中,会使用默认的FilterSecuritylnterceptor来进行权限校验。在FilterSecuritylnterceptor中会从 SecurityContextHolder获取其中的Authentication,然后获取其中的权限信息,判断当前用户是否拥有访问当前资源所需的权限。
 所以我们在项目中只需要把当前登录用户的权限信息也存入Authentication。然后设置我们的资源所需要的权限即可。
授权实现
限制访问资源所需权限
SpringSecurity提供了基于注解的权限控制方案,这也是项目中主要采用的方式。可以使用注解去指定访问对应的资源所需的权限。
开启相关配置
@EnableGlobalMethodSecurity(prePostEnabled = true)
@Configuration
@EnableGlobalMethodSecurity(prePostEnabled = true)
public class SecurityConfig extends WebSecurityConfigurerAdapter {

    @Autowired
    private JwtAuthenticationTokenFilter jwtAuthenticationTokenFilter;

    @Bean
    public PasswordEncoder passwordEncoder(){
        return new BCryptPasswordEncoder();
    }

    @Bean
    @Override
    public AuthenticationManager authenticationManagerBean() throws Exception {
        return super.authenticationManagerBean();
    }

    @Override
    protected void configure(HttpSecurity http) throws Exception {
        // 关闭csrf
        http.csrf().disable()
                // 不通过session获取SecurityContext
                .sessionManagement().sessionCreationPolicy(SessionCreationPolicy.STATELESS)
                .and()
                .authorizeRequests()
                // 对于登录接口,允许匿名访问
                .antMatchers("/user/login").anonymous()
                // 除上面外的所有请求全部需要鉴权认证
                .anyRequest().authenticated();

        // 配置认证过滤器在UsernamePasswordAuthenticationFilter之前
        http.addFilterBefore(jwtAuthenticationTokenFilter, UsernamePasswordAuthenticationFilter.class);
    }

}
使用注解@PreAuthorize设置所需权限信息
@RestController
public class HelloController {

    @GetMapping("/test")
    @PreAuthorize("hasAuthority('test')")
    public String test(){
        return "hello SpringSecurity";
    }

}
封装权限信息
我们前面在写UserDetailsServicelmpl的时候说过,在查询出用户后还要获取对应的权限信息,封装到UserDetails中返回。我们先直接把权限信息写死封装到UserDetails中进行测试。
我们之前定义了UserDetails的实现类LoginUser,想要让其能封装权限信息就要对其进行修改:
登录实体LoginUser
@Data
@NoArgsConstructor
public class LoginUser implements UserDetails {

    /**
     * 用户信息
     */
    private User user;

    /**
     * 用户权限信息
     */
    private List<String> permissions;

    /**
     * SecurityContextHolder中的权限信息
     * 不需要序列化到redis中
     */
    @JSONField(serialize = false)
    private Set<SimpleGrantedAuthority> authorities;

    public LoginUser(User user, List<String> permissions) {
        this.user = user;
        this.permissions = permissions;
    }

    @Override
    public Collection<? extends GrantedAuthority> getAuthorities() {
        // 保证authorities只有一份实例
        if (authorities != null){
            return authorities;
        }
        authorities = permissions.stream()
                .map(SimpleGrantedAuthority::new)
                .collect(Collectors.toSet());

        return authorities;
    }

    @Override
    public String getPassword() {
        return user.getPassword();
    }

    @Override
    public String getUsername() {
        return user.getUserName();
    }

    @Override
    public boolean isAccountNonExpired() {
        return true;
    }

    @Override
    public boolean isAccountNonLocked() {
        return true;
    }

    @Override
    public boolean isCredentialsNonExpired() {
        return true;
    }

    @Override
    public boolean isEnabled() {
        return true;
    }
}
修改UserDetailsServiceImpl
@Service
public class UserDetailsServiceImpl implements UserDetailsService {
@Autowired
private UserMapper userMapper;
@Override
public UserDetails loadUserByUsername(String username) throws UsernameNotFoundException {
// 查询用户信息
LambdaQueryWrapper<User> queryWrapper = new LambdaQueryWrapper<>();
queryWrapper.eq(User::getUserName, username);
User user = userMapper.selectOne(queryWrapper);
// 如果没有查询到用户,就抛出异常
if (Objects.isNull(user)){
throw new RuntimeException("用户名或者密码错误");
}
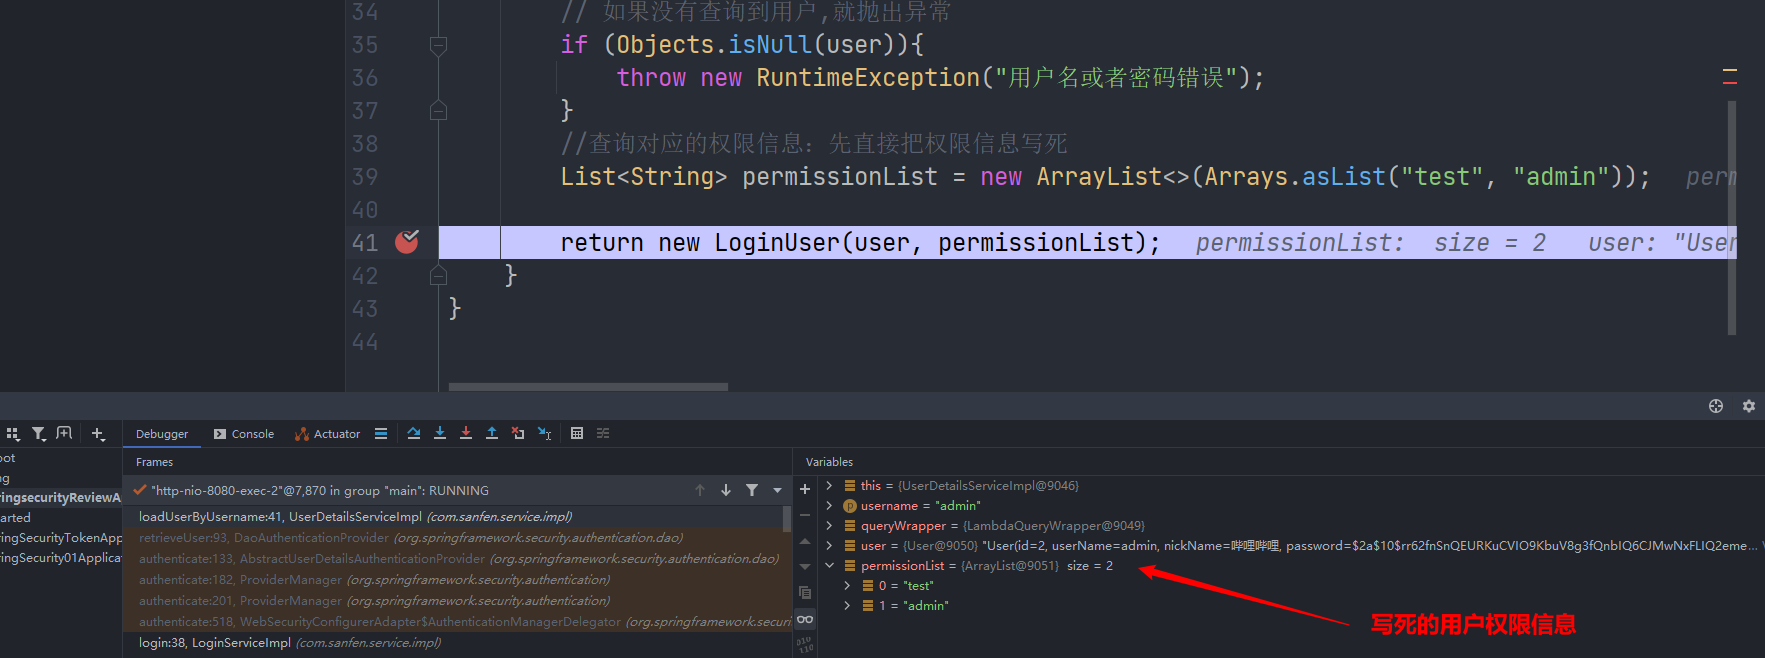
//查询对应的权限信息:先直接把权限信息写死
List<String> permissionList = new ArrayList<>(Arrays.asList("test", "admin"));
return new LoginUser(user, permissionList);
}
}
修改认证过滤器
@Component
public class JwtAuthenticationTokenFilter extends OncePerRequestFilter {
@Autowired
private RedisCache redisCache;
@Override
protected void doFilterInternal(HttpServletRequest request, HttpServletResponse response, FilterChain filterChain) throws ServletException, IOException {
// 获取token
String token = request.getHeader("Authorization");
if (!StringUtils.hasText(token)){
filterChain.doFilter(request, response);
return;
}
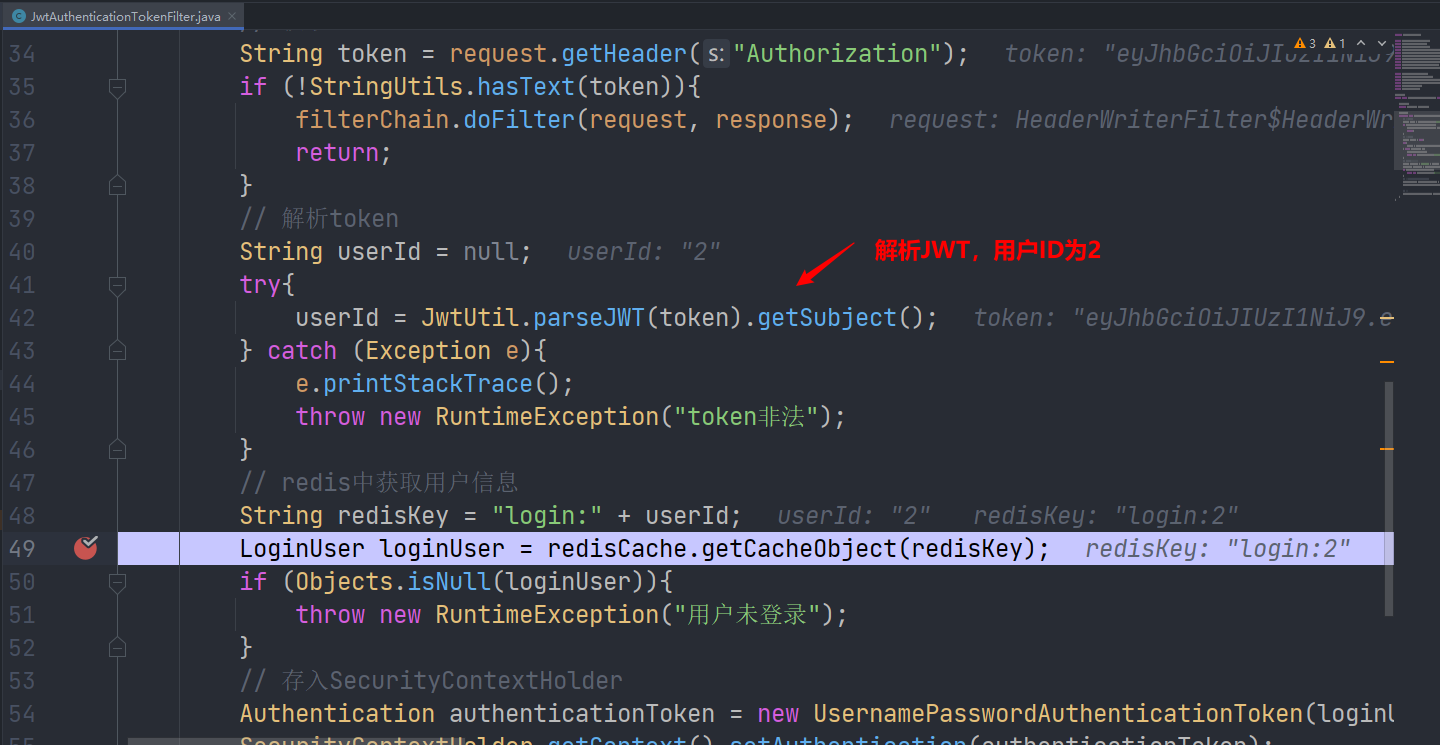
// 解析token
String userId = null;
try{
userId = JwtUtil.parseJWT(token).getSubject();
} catch (Exception e){
e.printStackTrace();
throw new RuntimeException("token非法");
}
// redis中获取用户信息
String redisKey = "login:" + userId;
LoginUser loginUser = redisCache.getCacheObject(redisKey);
if (Objects.isNull(loginUser)){
throw new RuntimeException("用户未登录");
}
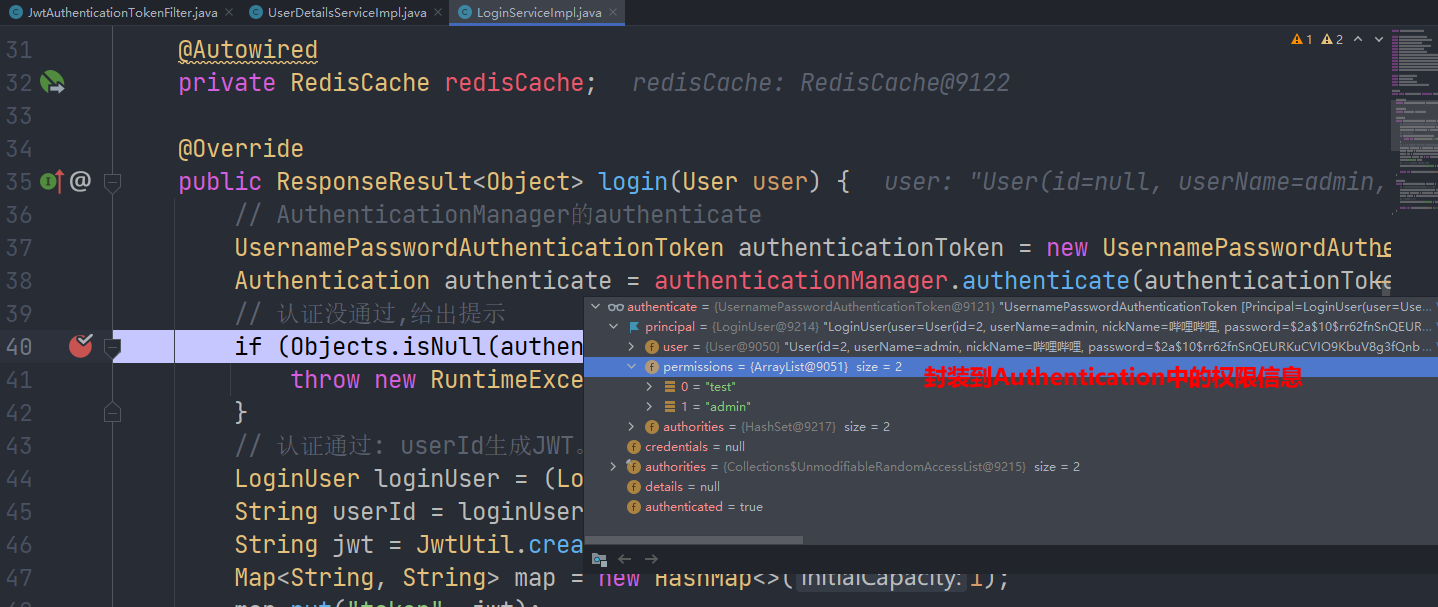
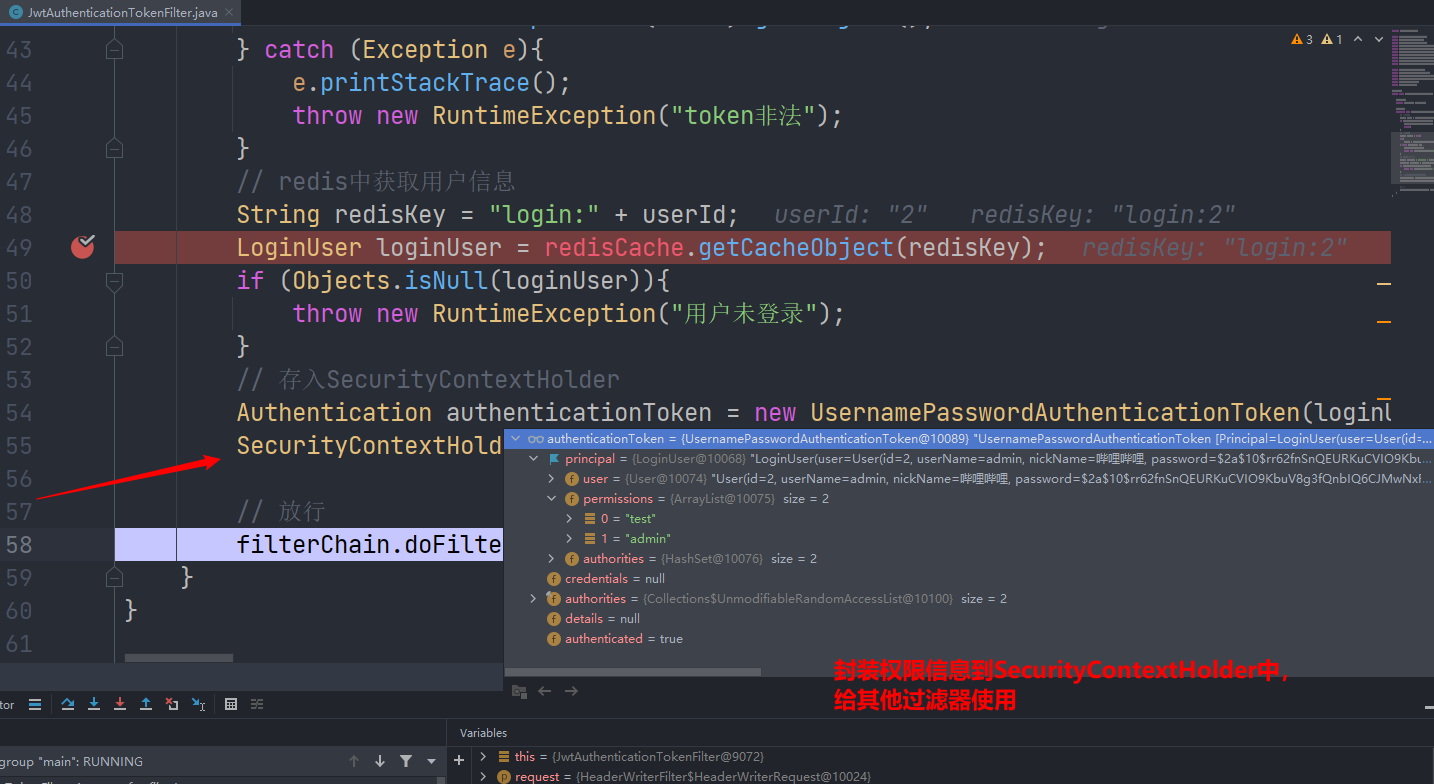
// 存入SecurityContextHolder
Authentication authenticationToken = new UsernamePasswordAuthenticationToken(loginUser, null, loginUser.getAuthorities());
SecurityContextHolder.getContext().setAuthentication(authenticationToken);
// 放行
filterChain.doFilter(request, response);
}
}
debug调试
在JwtAuthenticationTokenFilter和UserDetailsServiceImpl和LoginServiceImpl中分别打一个断点,进行debug。记住需要重新登录:
访问登录接口
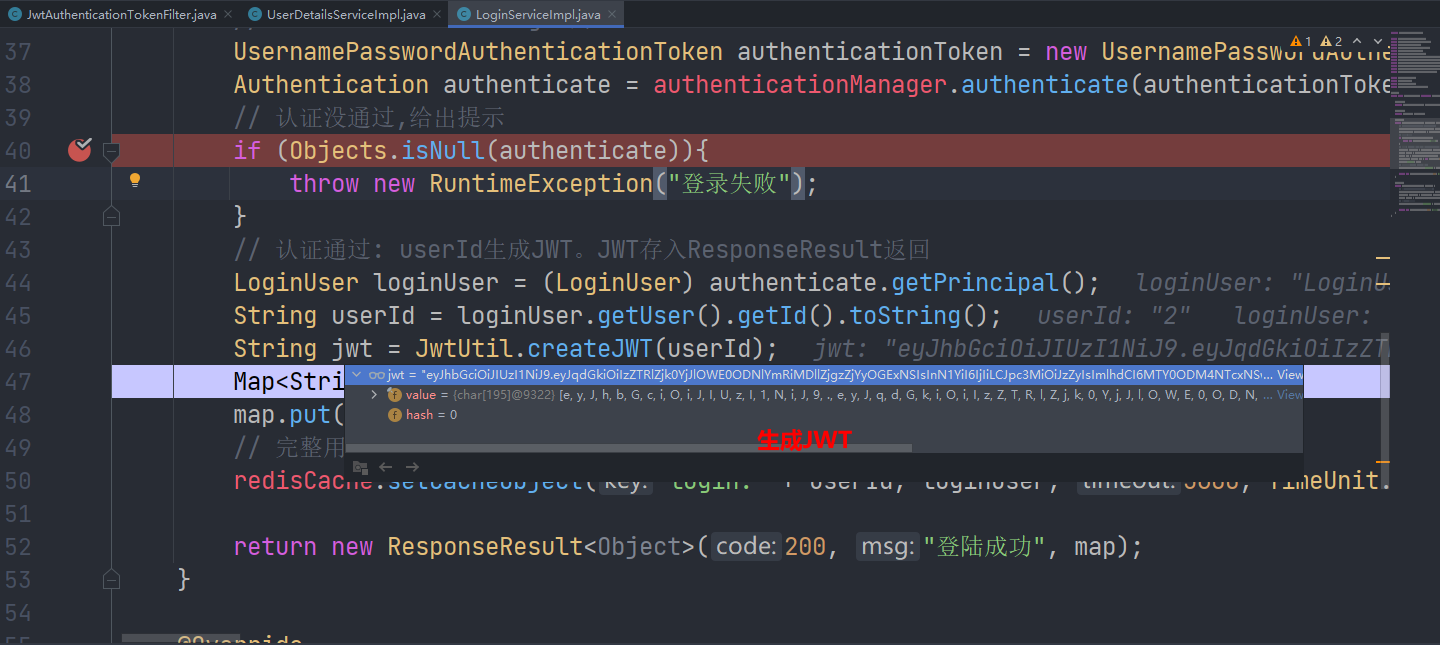
然后放行进行LoginServiceImpl接口:
再往下走,生成了JWT:
然后直接放行,发现redis中已经有了用户登录信息。
用最新的token请求头访问test接口
根据JWT解析的用户ID,到redis中查询用户:
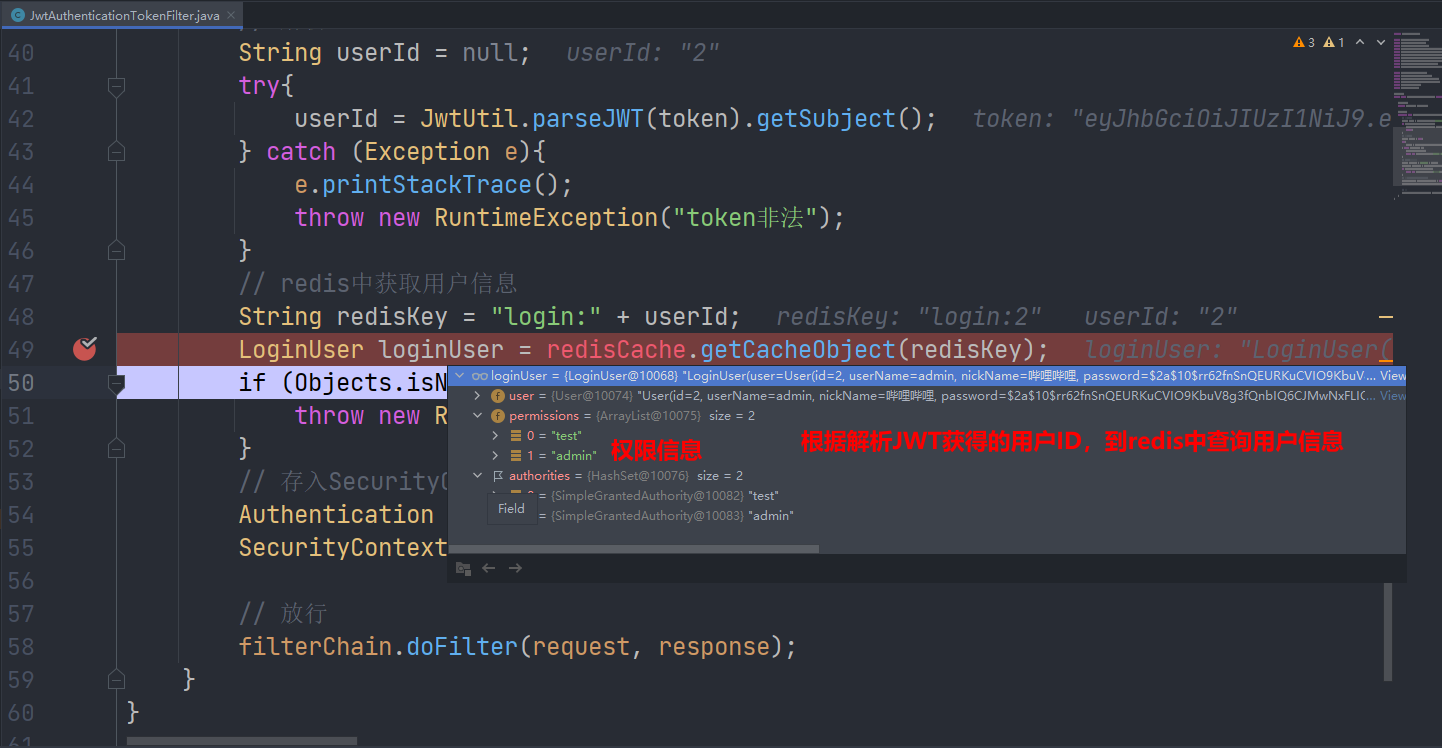
封装权限信息:
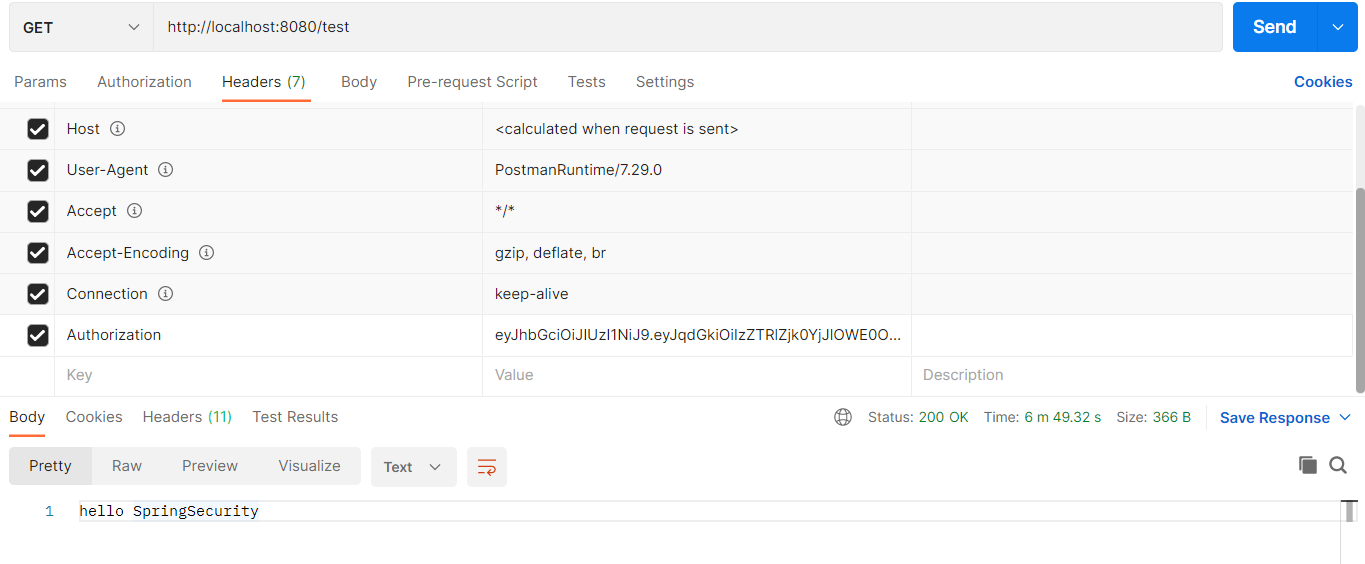
然后放行,因为登录的用户有"test"权限,所以能访问test接口:
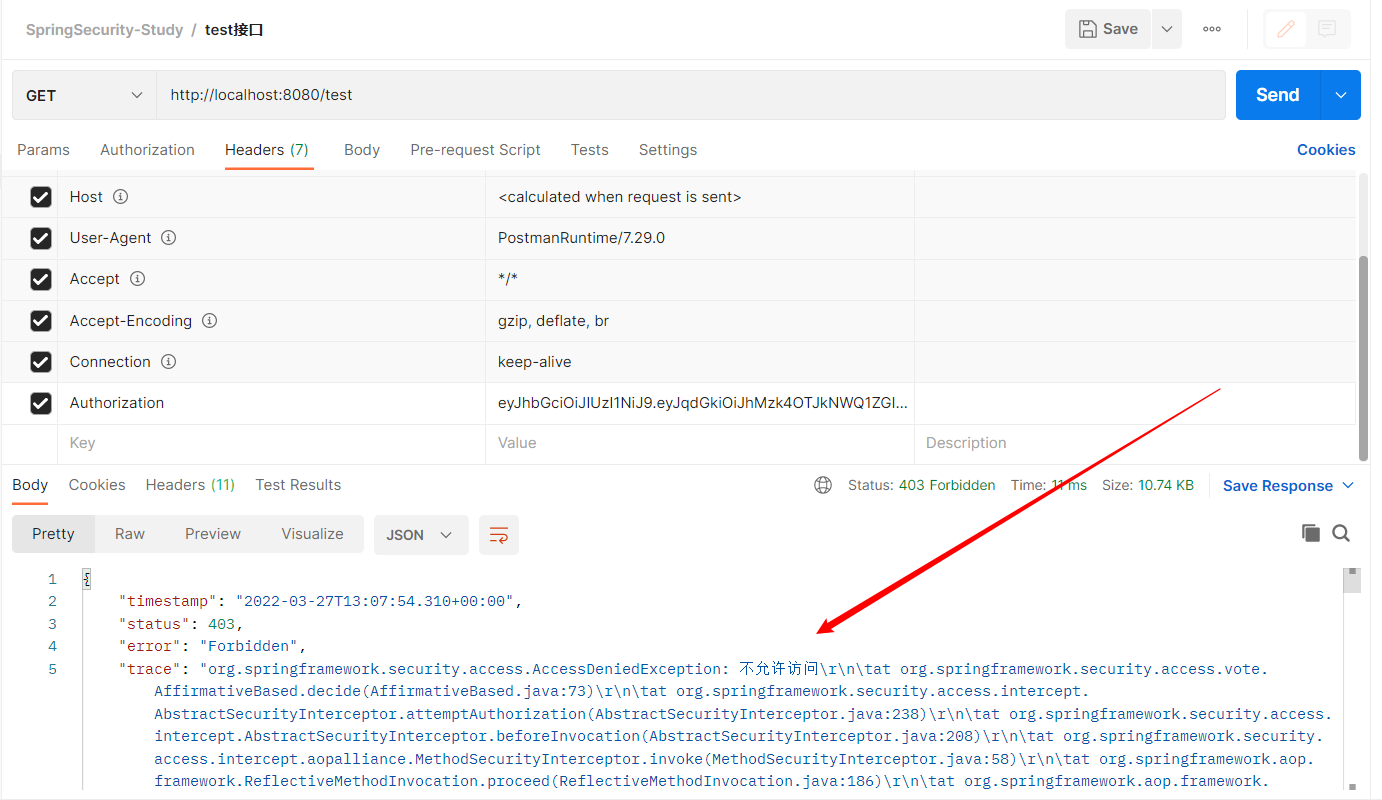
如果修改test接口的权限为
"test333",用户没有,就没有权限访问。
@RestController
public class HelloController {

    @GetMapping("/test")
    @PreAuthorize("hasAuthority('test333')")
    public String test(){
        return "hello SpringSecurity";
    }

}